Adding Moulding To Flat Kitchen Cabinets : adding trim to create dimension on cabinet door | Cabinet door makeover, Diy kitchen cabinets ... - Then cut the angle at 45 degrees just like you did with the lumber, but this time the oak casing is on its side.
Adding Moulding To Flat Kitchen Cabinets : adding trim to create dimension on cabinet door | Cabinet door makeover, Diy kitchen cabinets ... - Then cut the angle at 45 degrees just like you did with the lumber, but this time the oak casing is on its side.. They are all usually found in the wood trim section and come unpainted. Take the mdf trim pieces off the cabinet door and place them right next to the side they will be installed on, putting them front side down. Remove all the hardware from the cabinet doors. You will not be adding molding to the faces of the. But looked too thick.i would appreciate.
My studio renovation had 2 main goals: On january 4, 2012 • by kristi • 5. We have had several clients lately add these decorative pieces to islands, stove hoods and other furniture type cabinets. Place a weight on it and leave it for 10 to 12 hours. Measure around the perimeter of the exposed sides and ends of the cabinets.
From Drab to Fab: Adding trim to Cabinets from www.naptimedecorator.net I'm excited for you to start using power tools. When they are dry, use wood glue to affix the molding and embellishments to the cabinet. Add moulding to flat cabinets google search old vanity diy inexpensive cabinet updates update cabinets redo kitchen hack diy shaker style cabinets cherished bliss how to add trim and paint your laminate cabinets brepurposed kitchen redo part 2 with images cabinets add moulding to flat cabinets google search old vanity. You can view the kitchen cabinet applies strong wood as the material. Measure your cabinet door to determine how much molding you'll need. Paint the cabinet, molding, and embellishments the same color. Scribe molding is a great way to make a cabinet look finished and make it look like it belongs. But looked too thick.i would appreciate.
What i ended up doing is transforming my flat doors into shaker style cabinets by simply adding trim to the doors.
This will remove dust to help the liquid nails or wood glue adhere. If not, you can check that post out here. Our 90's home was graced with ugly flat panel interior doors that are nothing nice to look at. Fill in the holes and corners with wood filler and sand. Remember to angle your radial arm saw accordingly. You may have seen that i challenged myself to update our blue master bathroom on a strict budget. My studio renovation had 2 main goals: I desperately needed more closed storage and devised a plan to use salvaged kitchen cabinets, but i wasn't just looking for any salvaged kitchen cabinets. Then cut the angle at 45 degrees just like you did with the lumber, but this time the oak casing is on its side. We suggest installing this type of kitchen cabinet molding for functionality as they deflect the light glare, while also adding a decorative touch. Place a weight on it and leave it for 10 to 12 hours. Start with the oak flat casing, cut the casing to match your entire cupboard length (84″ in our case). Take the mdf trim pieces off the cabinet door and place them right next to the side they will be installed on, putting them front side down.
I desperately needed more closed storage and devised a plan to use salvaged kitchen cabinets, but i wasn't just looking for any salvaged kitchen cabinets. $50 in molding definitely helped improve the looks of this kitchen. I briefly considered making completely new doors, but as you might expect, that can cost quite a bit. 1) to be as economical as possible. Place a weight on it and leave it for 10 to 12 hours.
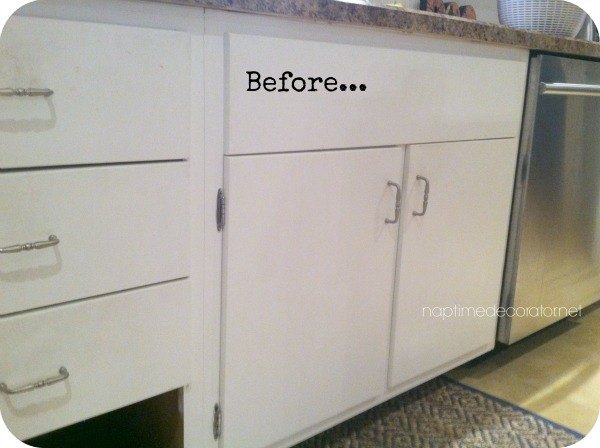
Adding Trim to 1960s Cabinets | Hometalk from cdn-fastly.hometalk.com Measure around the perimeter of the exposed sides and ends of the cabinets. On january 4, 2012 • by kristi • 5. Remember to angle your radial arm saw accordingly. Measure the perimeter of each door, going from corner to corner. When they are dry, use wood glue to affix the molding and embellishments to the cabinet. Then, take a dry cloth and wipe both mdf trim pieces and cabinet door. This will assure the bond is firm. Scribe molding is a great way to make a cabinet look finished and make it look like it belongs.
But looked too thick.i would appreciate.
$50 in molding definitely helped improve the looks of this kitchen. Just make the plywood 3/4 smaller all the way around the cabinet, then use 3/4 material for the nailers. What i ended up doing is transforming my flat doors into shaker style cabinets by simply adding trim to the doors. Paint the cabinet, molding, and embellishments the same color. If the cabinets are already installed, it's easier to make a plywood top and slide that up on top of the cabinets and throw a couple fasteners through the inside of the cabinet to secure the backing. Then, take a dry cloth and wipe both mdf trim pieces and cabinet door. I printed the picture of your trim and took it to lowes and they had no idea what it was.i found a piece of mdf that was 1 1/2 in. The activities can attach the kitchen cabinet to the wall. For part 3 of the easy (and inexpensive) cabinet updates series we are talking about drawers. You can view the kitchen cabinet applies strong wood as the material. 1) to be as economical as possible. Here's how to do it: Provide a nailing surface for crown moulding by attaching solid wood mounting strips to the top edges of the cabinets.
If the cabinets are already installed, it's easier to make a plywood top and slide that up on top of the cabinets and throw a couple fasteners through the inside of the cabinet to secure the backing. Adding plywood trim is an economical way to convert plain or outdated cabinets to shaker style. I briefly considered making completely new doors, but as you might expect, that can cost quite a bit. Adding a little bit of detail to flat panel doors transforms them into something you can be proud of. I'm excited for you to start using power tools.
EB Loves Old Houses | How to Add Trim to Old Cabinets - spruce up those old, flat cabinet ... from i.pinimg.com I also installed molding on a plain area of the cabinets. This will assure the bond is firm. Sand the doors lightly to remove any dirt and gloss from the old finish. Flat front laminate cabinet doors are so plain and basic. $50 in molding definitely helped improve the looks of this kitchen. Remember to angle your radial arm saw accordingly. If trim is being placed on the cabinet doors that are lying flat, the trim should be covered with plastic wrap. Cabinet doors updated with molding.
I love what you have done to your cabinets.can you tell me what type of trim you used and what the measurements are on the thickness of the trim?
If the cabinets are already installed, it's easier to make a plywood top and slide that up on top of the cabinets and throw a couple fasteners through the inside of the cabinet to secure the backing. From what you've said i'm picturing a piece of molding that lays flat would look good between the cabinets and soffit to hide the gap and then i can picture crown molding where the soffit and ceiling meet. Then cut the angle at 45 degrees just like you did with the lumber, but this time the oak casing is on its side. You may have seen that i challenged myself to update our blue master bathroom on a strict budget. I love what you have done to your cabinets.can you tell me what type of trim you used and what the measurements are on the thickness of the trim? If it is a wooden trim, simply nail it to the cabinet. Paint the cabinet, molding, and embellishments the same color. Adding shaker trim to flat panel cabinets. Today, we're talking to you about updating interior doors with molding. We suggest installing this type of kitchen cabinet molding for functionality as they deflect the light glare, while also adding a decorative touch. Start with the oak flat casing, cut the casing to match your entire cupboard length (84″ in our case). My studio renovation had 2 main goals: We have had several clients lately add these decorative pieces to islands, stove hoods and other furniture type cabinets.